Most Recent From The Blog
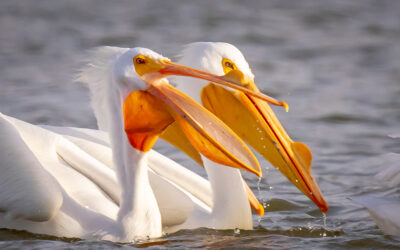
Pelicans in Indiana? Who knew?
As a nature and wildlife photographer, I am always seeking new adventures and opportunities to capture the beauty of nature through my lens. Recently, I had the privilege of photographing the American White Pelican at Brookville Lake in Indiana. It was an unexpected...
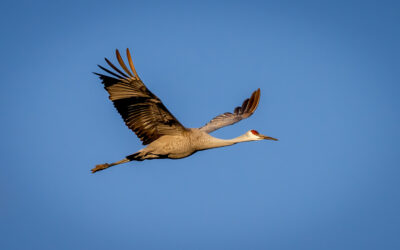
Sandhill Cranes of Brookville Lake
Rather than my traditional stomping grounds in Florida, I wintered over in Indiana this year. Thankfully, it was a mild winter, considering I live in an RV. Other than some minor issues with frozen water lines in the belly of the RV, I stayed very comfortable inside...
Looking Back Over 10 Years
In preparation for a short eBook I'm creating, I was taking stock of what I've been doing over the past 10 years. I was kind of surprised by some of my accomplishments since 2011. I never realized that I had been so productive. In the past 10 years, I have acquired...
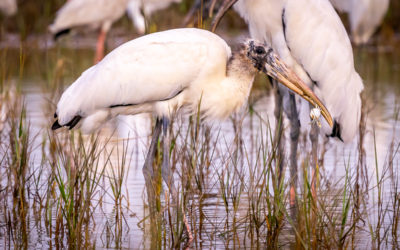
Wood Stork Catches Crab
It's a bad day to be a tiny crab. This young wood stork is about to have a crab dinner at St. Marks National Wildlife Refuge. I know it's a young wood stork because it still has feathers on the neck and head. This is what I would call a sketch image. I want to try to...
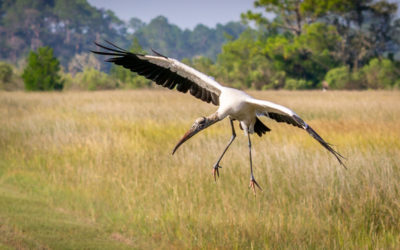
Wood Storks of St. Marks
A little over a year ago, I was photographing brown pelicans at St. Marks National Wildlife Refuge. A half mile away, I saw a large bird sitting atop a small, dead tree. Through my lens, it vaguely looked like a stork but I wasn’t sure. I did some research and...
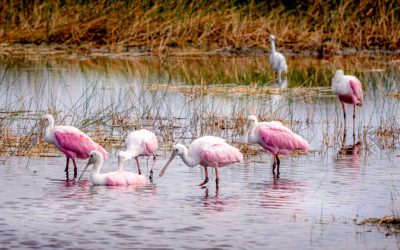
Pretty in Pink
I discovered these Roseate Spoonbills in the freshwater marshes in several areas of St. Marks National Wildlife Refuge. Until two weeks ago, I had never seen or heard of the Roseate Spoonbill. I'm assuming they have always been around but my timing was not right until...